MCP server basics - Building an MCP server for reminders
Step by step instructions to enable seamless interaction between AI assistants and your applications.
tl;dr;
Create an MCP server to handle reminders to understand how data flows between the MCP client and the serverIntroduction to MCP Servers
MCP (Model Context Protocol) servers are designed to bridge the gap between AI models and external tools or services. They serve a similar purpose to what API endpoints have been doing for decades. MCP servers expose a set of “tools” (APIs) that the AI can call to perform actions, fetch data, or automate workflows. This enables AI assistants to interact with your apps, databases, or devices in a secure and structured way.
MCP is an open protocol. You can find more details and the full specification at modelcontextprotocol.io.
What We Are Building
In this post, we’ll build a simple MCP server that manages reminders. The server will expose a tool to add reminders, which can then be invoked by an AI assistant or inspected manually. This example will help you understand how to structure your server, handle inputs, and ensure a smooth experience for both users and AI models.
Let’s start building
We will start with a simple TypeScript server and progressively add features. We won’t really be saving the reminder but will mostly focus on interactions between MCP clients and the server. We will build a minimal MCP server exposing an add-reminder tool. We’ll use TypeScript and the official MCP SDK for this example. We follow the documentation at https://modelcontextprotocol.io/quickstart/server#node to get started.
Our scenario: Add a reminder to catch the bus daily at 5PM.
Set up the project
Install Node on your system from https://nodejs.org first so that you can run the TS code locally. Anything above Node 16 should be okay. Check if you have Node by running this in your terminal.
node --version
npm --version
Let’s initialize the project
# Create a new directory for our project
mkdir reminders
cd reminders

# Initialize a new npm project
npm init -y

# Install dependencies
npm install @modelcontextprotocol/sdk
npm install zod
npm install -D @types/node
npm install -D typescript
@modelcontextprotocol/sdkis the official MCP SDK - https://github.com/modelcontextprotocol/typescript-sdkzodis a TypeScript validation library. Not essential but eases development - https://zod.dev/@types/nodefor getting types for common Node modules.typescriptbecause type check is a boon.
Update your package.json to add type: "module" and a build script:
{
  "type": "module",
  "bin": {
    "reminders": "./build/index.js"
  },
  "scripts": {
    "build": "tsc",
    "watch": "tsc --watch"
  },
  "files": ["build"]
}
Create a tsconfig.json in the root:
{
  "compilerOptions": {
    "target": "ES2022",
    "module": "Node16",
    "moduleResolution": "Node16",
    "outDir": "./build",
    "rootDir": "./src",
    "strict": true,
    "esModuleInterop": true,
    "skipLibCheck": true,
    "forceConsistentCasingInFileNames": true
  },
  "include": ["src/**/*"],
  "exclude": ["node_modules"]
}
If you use a different directory structure, update
rootDirandoutDiraccordingly.
Add a basic server that does not do anything
Let’s start with a basic server that exposes the metadata about the server first.
Add the below to src\index.ts.
import { McpServer } from "@modelcontextprotocol/sdk/server/mcp.js";
import { StdioServerTransport } from "@modelcontextprotocol/sdk/server/stdio.js";

// Create server instance
const server = new McpServer({
  name: "reminders",
  version: "1.0.0",
  capabilities: {
    resources: {},
    tools: {},
  },
});

async function main() {
  const transport = new StdioServerTransport();
  await server.connect(transport);
  console.error("Reminder server running on stdio.");
}

main().catch((error) => {
  console.error(`Fatal error in main():`, error);
  process.exit(1);
});
name: "reminders",declares a server of the name “reminders”. This is the name that shows up on your clients like Claude. So choose wisely.const transport = new StdioServerTransport();creates a stdio-based server transport which essentially means you can start receiving messages on stdin and sending messages on stdout. This is essentially how local MCP servers talk to clients.Using stdio also means that you can’t randomly use
console.logstatements in your code anymore as they will be passed back to the client and will cause parsing errors.
Add functionality to add a reminder from text
Let’s add a tool to the server so that we can add the add-reminder skill to our server.
// ...
import { z } from "zod";
// ...
// const server = new McpServer({...});
// ...
server.tool(
  "add-reminder",
  "Add a reminder for the user",
  {
    reminderText: z
      .string()
      .describe("Free form text containing the content of the reminder"),
  },
  async ({ reminderText }, ctx) => {
    // TODO: Actually save the reminder text to some external system.
    let response = [
      `Request ID : ${ctx.requestId}`,
      `Your reminder is set.`,
      `Reminder Content: "${reminderText}"`,
    ];
    return {
      content: [{ type: "text", text: response.join("\n") }],
    };
  }
);
// ...
// async function main() {...}
- Here we add a tool called
add-reminder. Make sure to use a good description of what the tool does so that the MCP client can have help text and it can choose your tool better. In our case, writing a simple text likeAdd a reminder...works because it is the only one that is installed, but in the real world, users will have multiple servers installed. Having a good description will ensure users are able to trigger your tool consistently. reminderTextis an argument that we expose.z.string()does a validation check that the value passed to reminderText is actually a string. It throws a runtime error otherwise. The description of the argument is also important as it is used by the client to understand what value to pass.- The callback function is where the actual processing happens. The
ctxobject has additional metadata sent by the client. This has the information that we had seen in the inspector likectx.requestId. - The return value has to be in a structured format. Since
contentis an array, you can send multiple content types like image, video, etc. as part of a single response. Here we only sendtext.
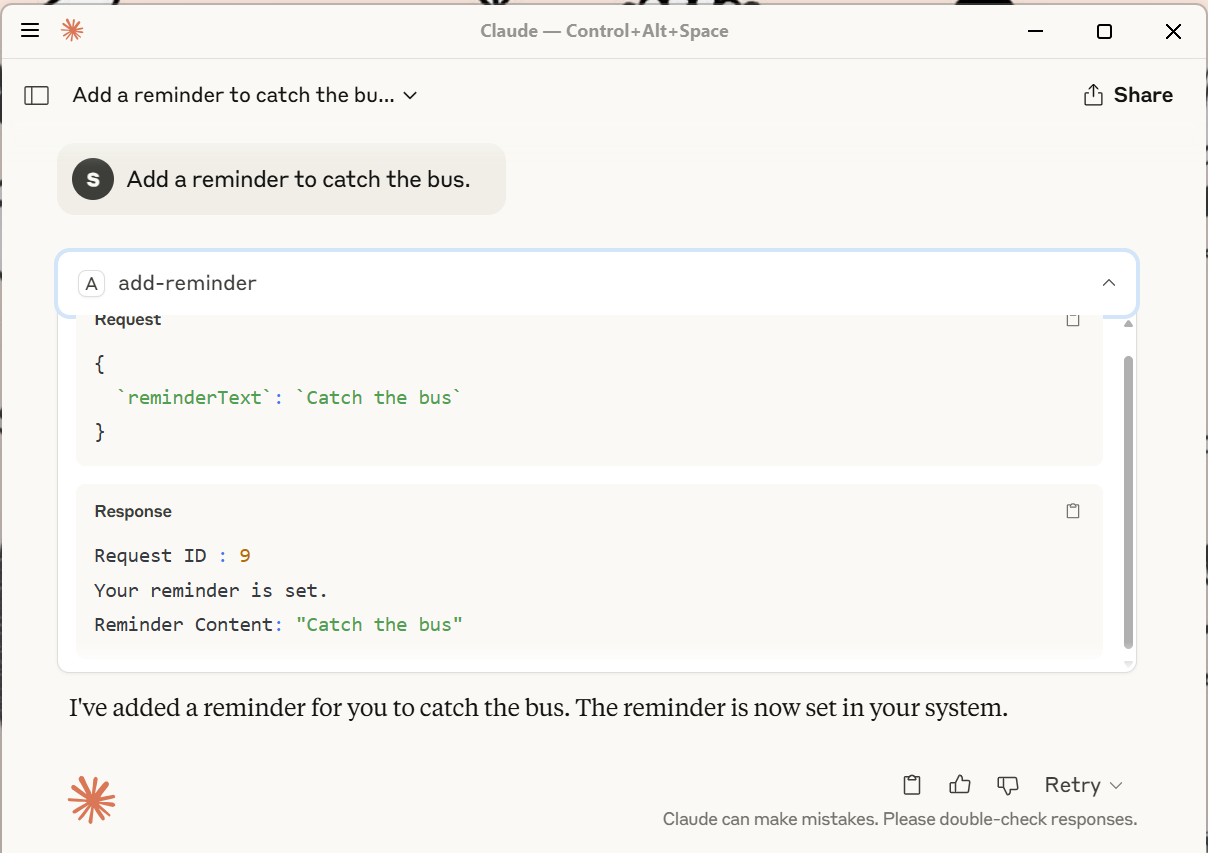
Testing this against Claude gives us a nice end-to-end working example.
Sample prompt
Add a reminder to catch the bus.
Test with inspector
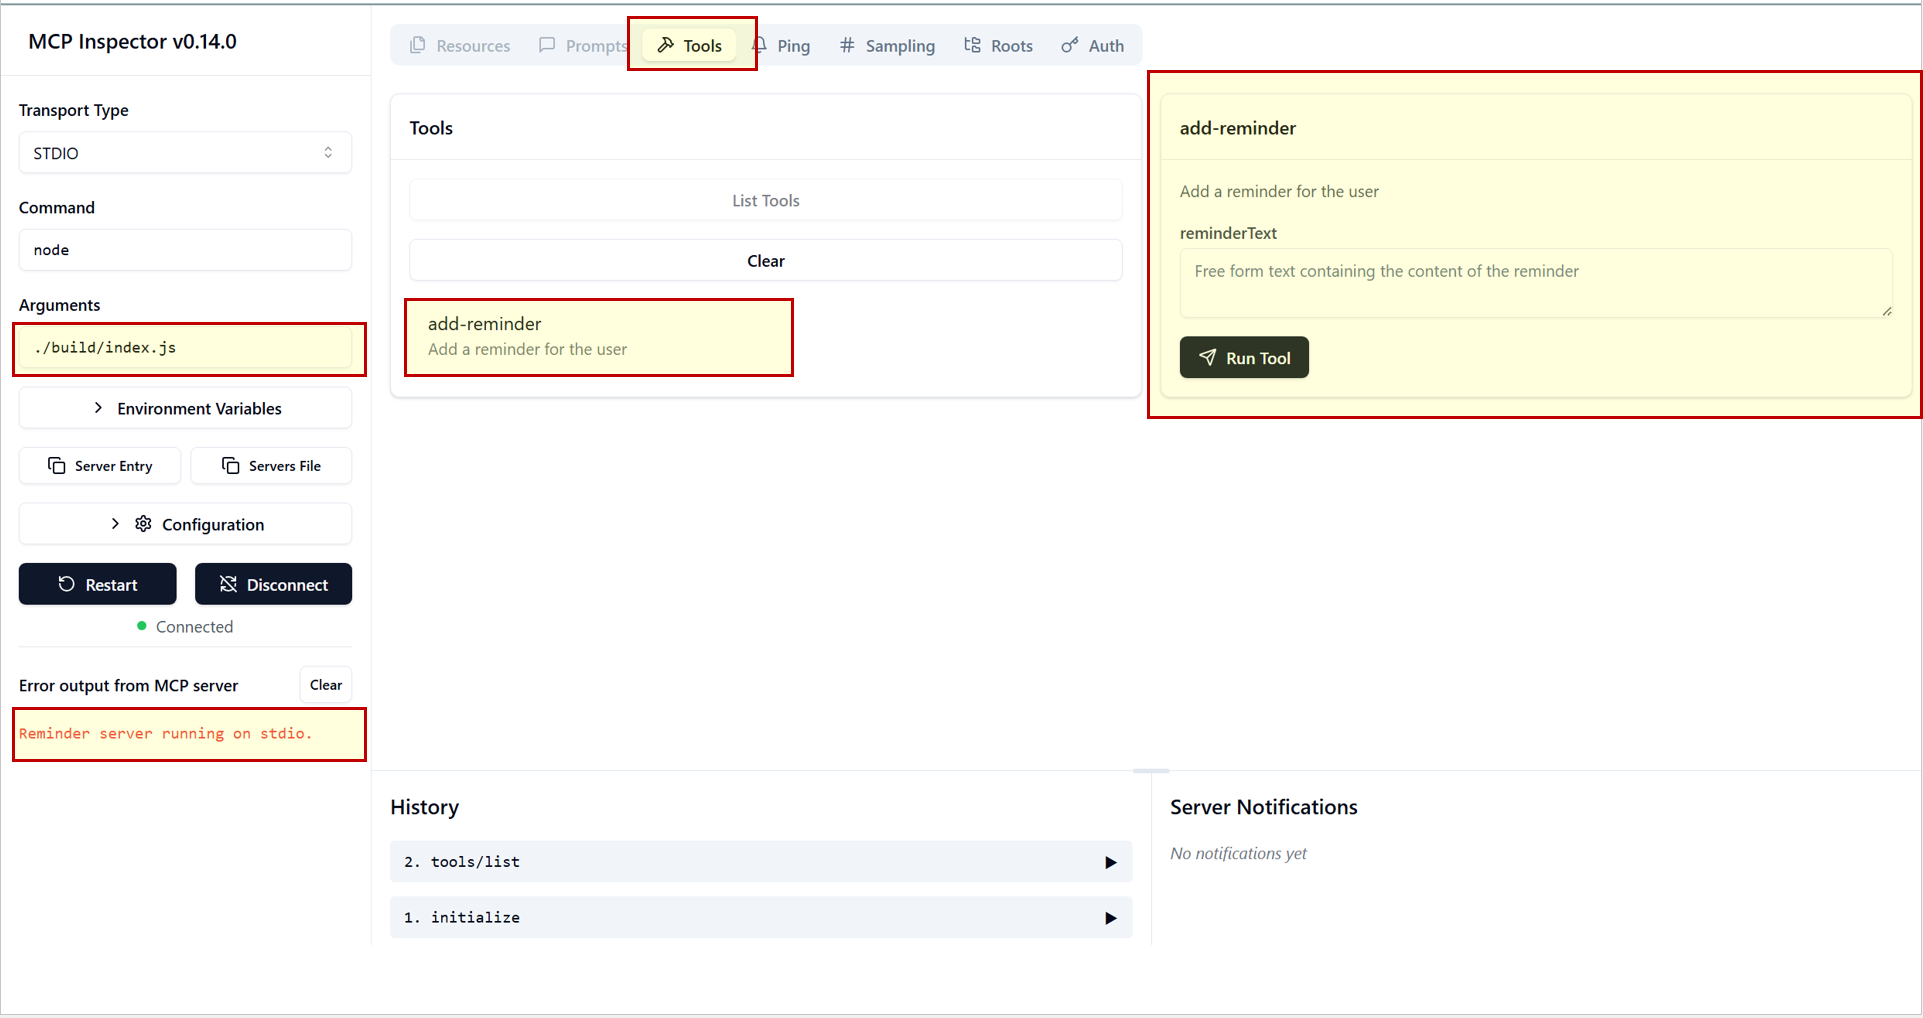
We can test the MCP server using the MCP Inspector. It is the simplest way to test the handling of different inputs from the mcp client.
- Build your server:
npm run build. - Open Inspector
npx -y @modelcontextprotocol/inspector node ./build/index.js

Click on connect and you should see the add-reminder tool with the reminderText parameter.
Try calling the add-reminder tool with sample inputs:
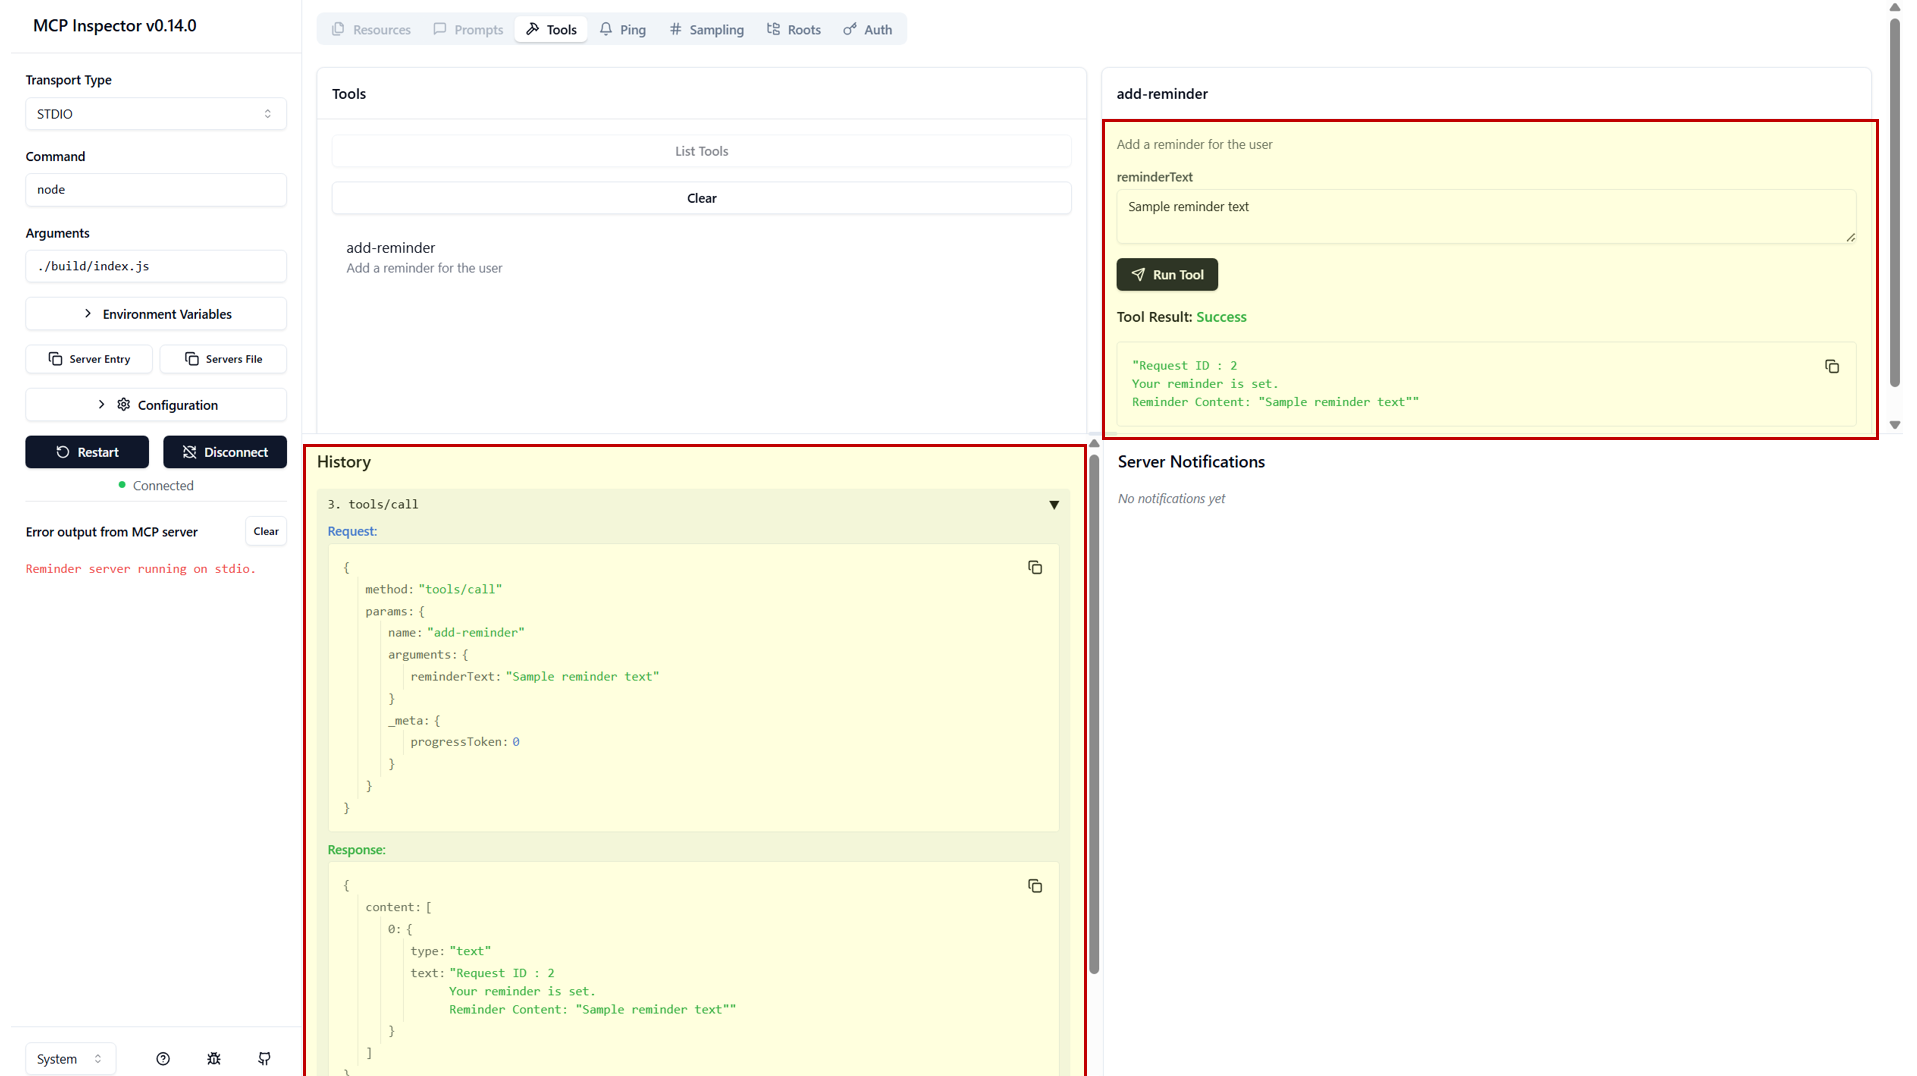
Inspector will show the request and response, helping you debug and iterate quickly.
Test with Claude Desktop
We should also test how the tool works with Claude Desktop in a real life scenario. We can follow the doc at Model Context Protocol docs to get started.
Open Claude and go to File->Settings->Developer->Edit config.
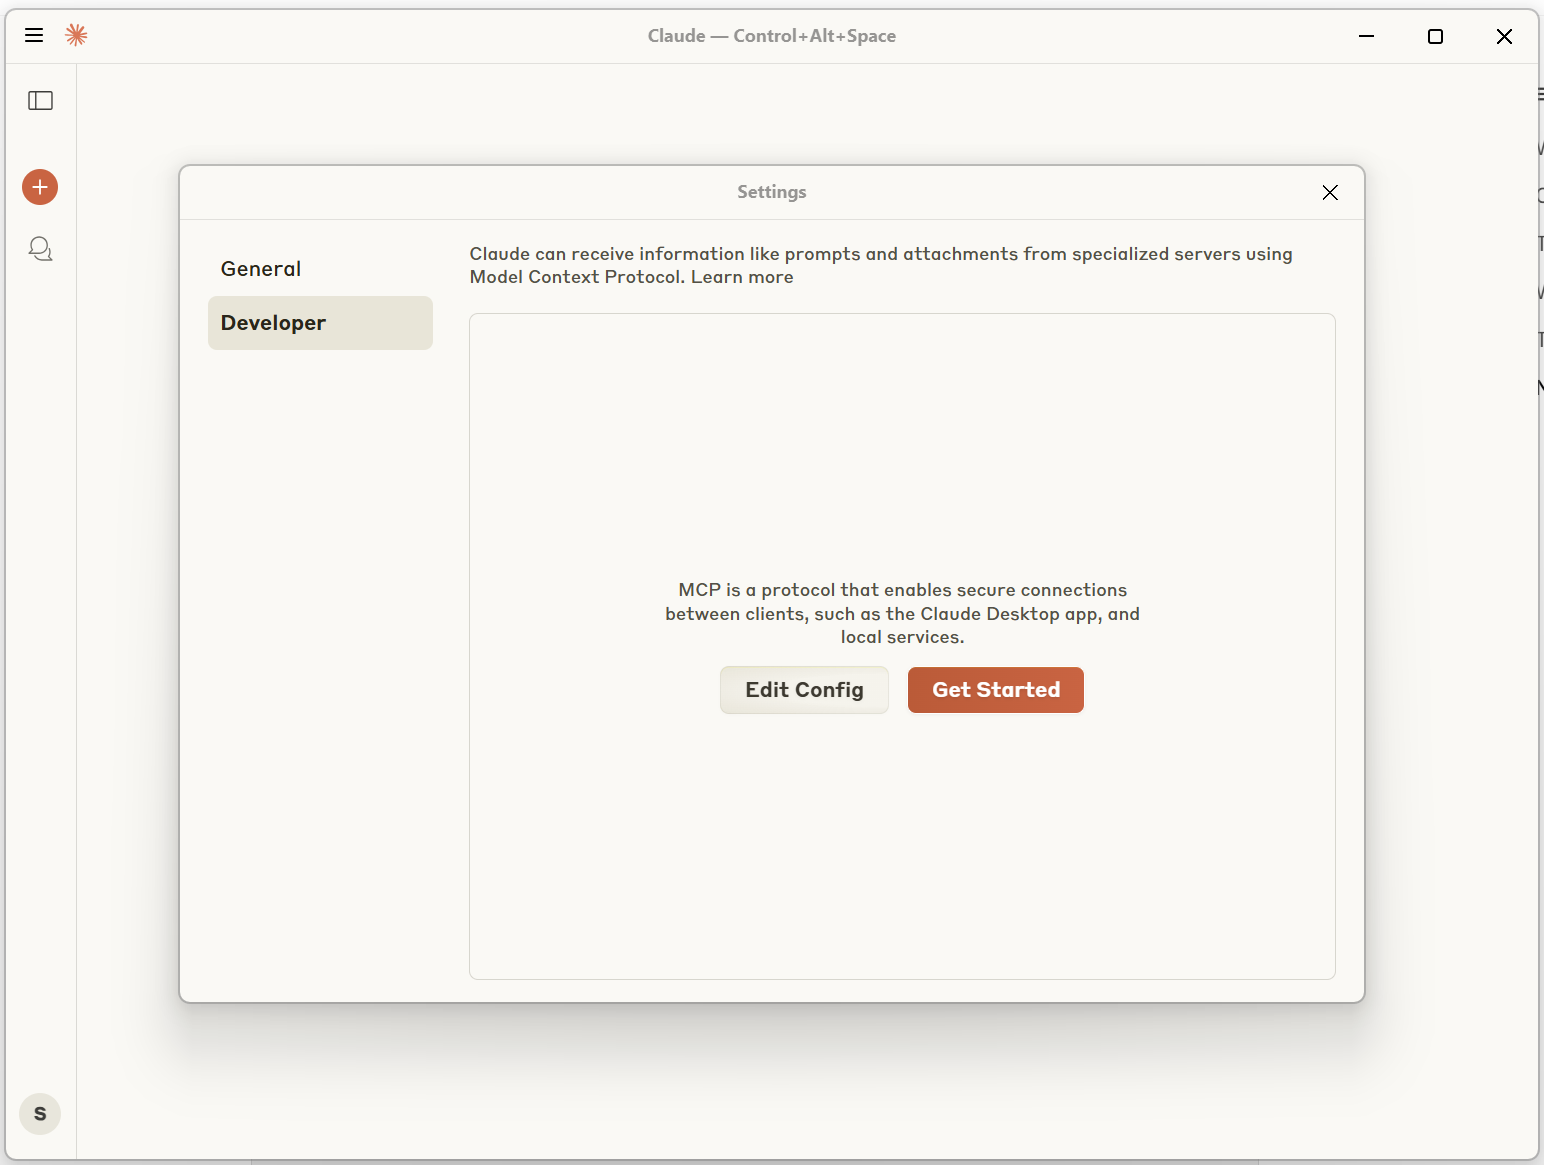
Add the following config to claude_desktop_config.json.
{
  "mcpServers": {
    "reminders": {
      "command": "node",
      "args": ["C:\\src\\Github\\reminders\\build\\index.js"] // Use absolute path.
    }
  }
}
Claude options should show reminders.
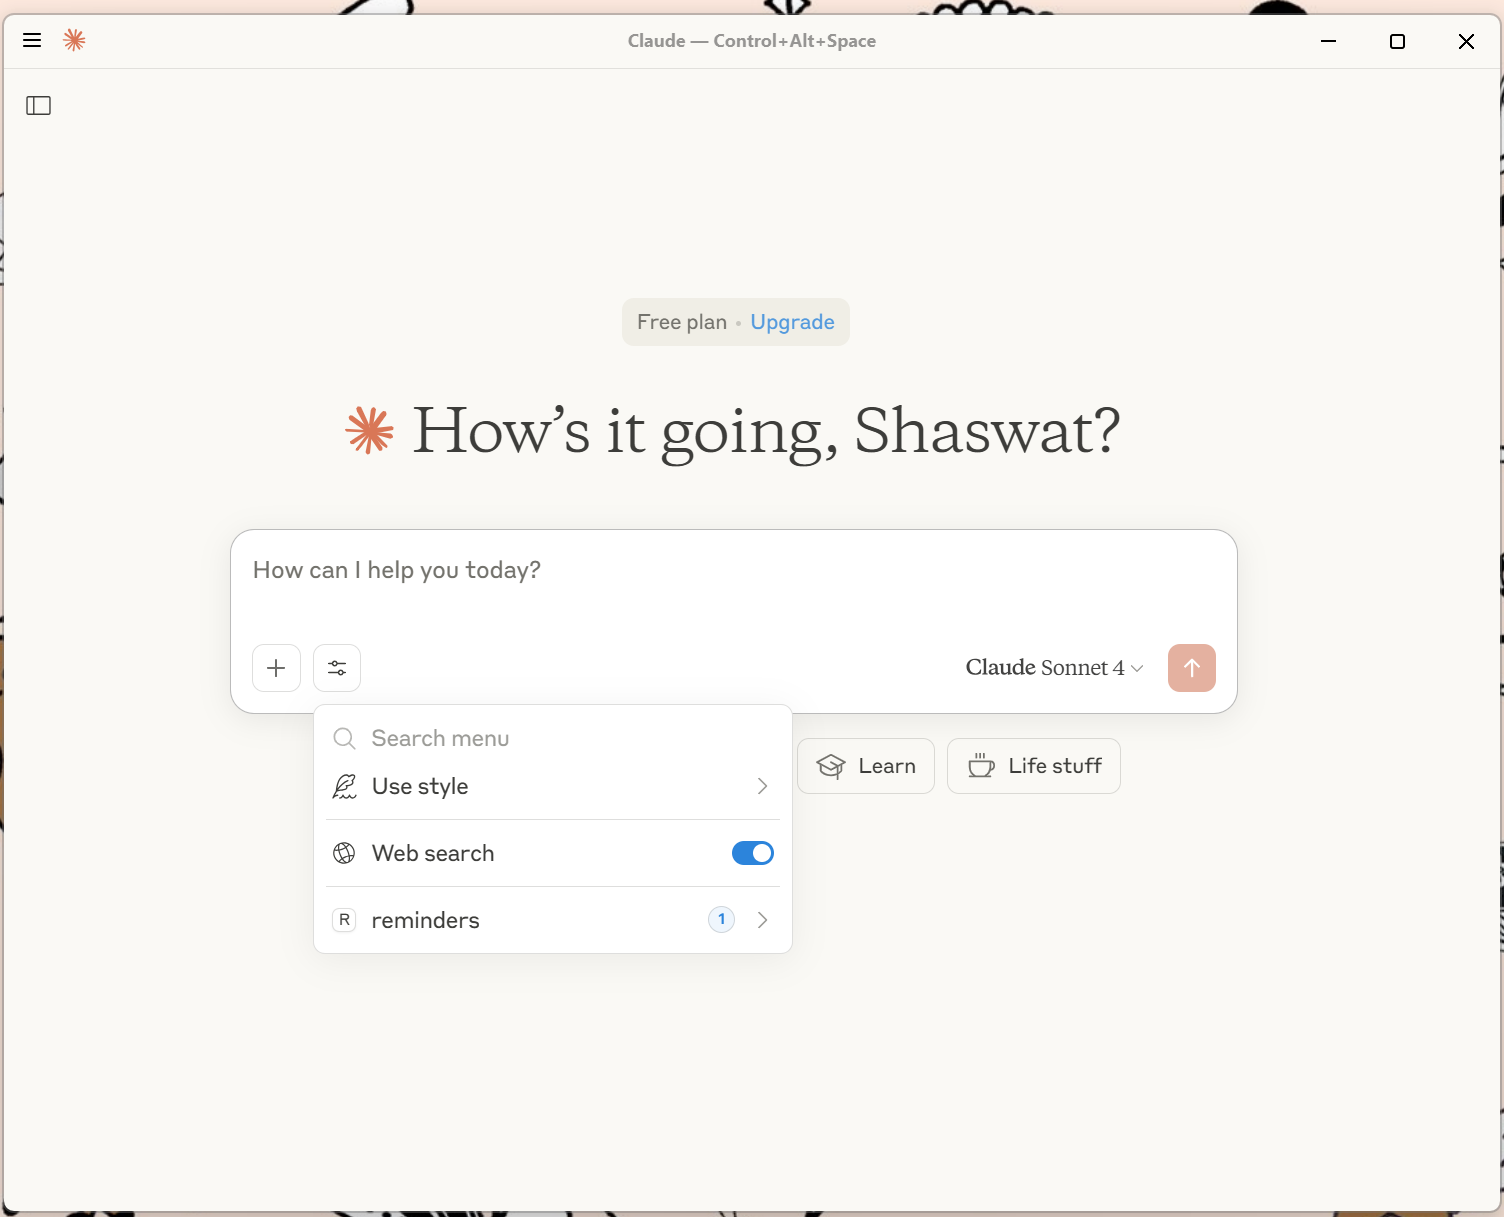
Under reminders, there should be the add-reminder tool enabled.
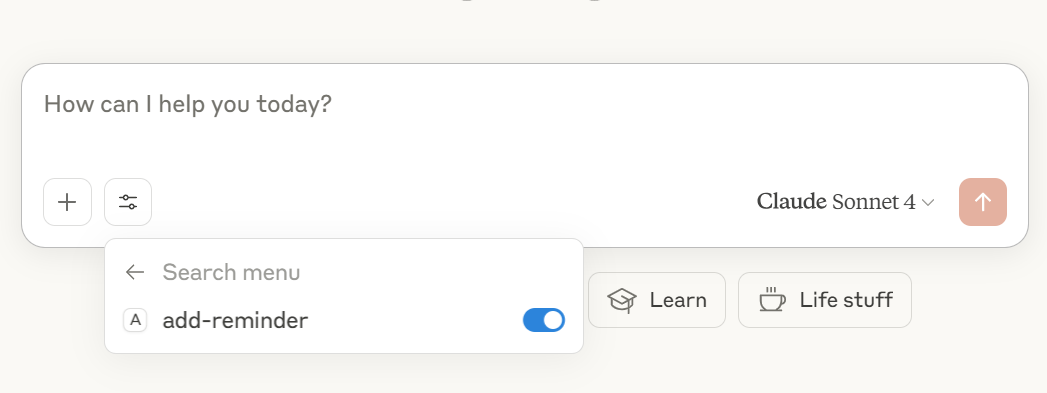
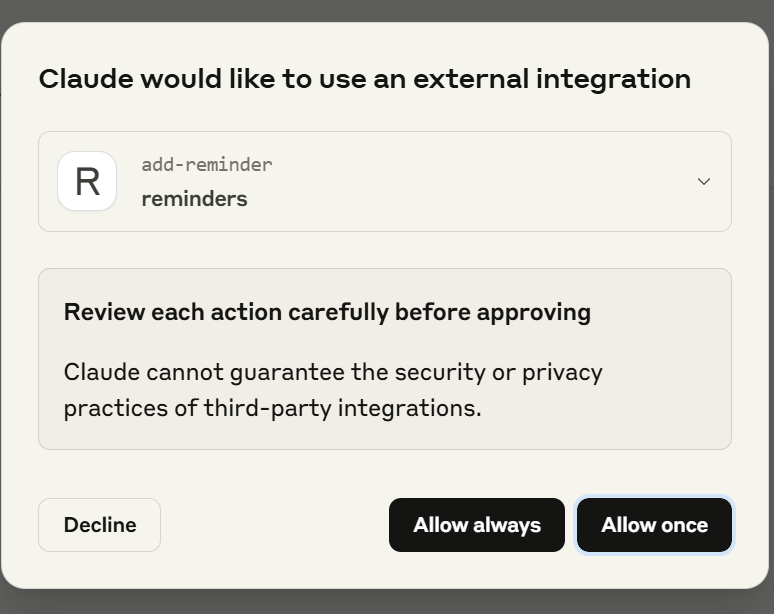
Claude will ask you for permission before using the server. During development, use “Allow Once” so that you can check the permission window and updates to it every time.
Use the prompt to see the request and response objects.
Add a reminder from text with date and time
Reminders don’t really work well without specifying when you should be reminded. Our intention here is that we want the LLMs to do the heavy lifting and figure out the reminder time from the user’s text instead of us parsing the original text and getting it. This is where the superpowers of LLMs start to kick in.
Let’s update our add-reminder tool to accept a reminderTime argument in addition to reminderText. This allows the client (or LLM) to extract and provide the time, so your server doesn’t need to parse natural language dates.
First, update the tool registration:
import { z } from "zod";

server.tool(
  "add-reminder",
  "Add a reminder for the user",
  {
    reminderText: z
      .string()
      .describe("Free form text containing the content of the reminder"),
    reminderTime: z
      .string()
      .optional()
      .describe(
        "Contains the date time of the reminder in ISO format if it is specified by the user. Use this field only if a single specific point in time is mentioned in the reminder."
      ),
  },
  async ({ reminderText, reminderTime }, ctx) => {
    // ...
    // Validate and parse reminderTime as ISO 8601
    let parsedTime: Date | null = null;
    try {
      parsedTime = new Date(reminderTime ?? "");
      if (isNaN(parsedTime.getTime())) {
        throw new Error("Invalid date");
      }
    } catch (e) {}
    let response = [
      `Request ID: ${ctx.requestId}`,
      `Your reminder is set.`,
      `Reminder Content: "${reminderText}"`,
      `Reminder Time: ${reminderTime}`,
      `Parsed Time: ${parsedTime}`,
    ];
    return {
      content: [{ type: "text", text: response.join("\n") }],
    };
  }
);
- Typically for dates you would want to use z.date() but we use z.string() here because MCP clients would not be able to parse Date objects directly. So, we add a string to date parser on our own and then take appropriate action if the date is not parseable.
- There is an additional
optional()decorator inreminderTimeto account for the fact that users may not specify a time at all.
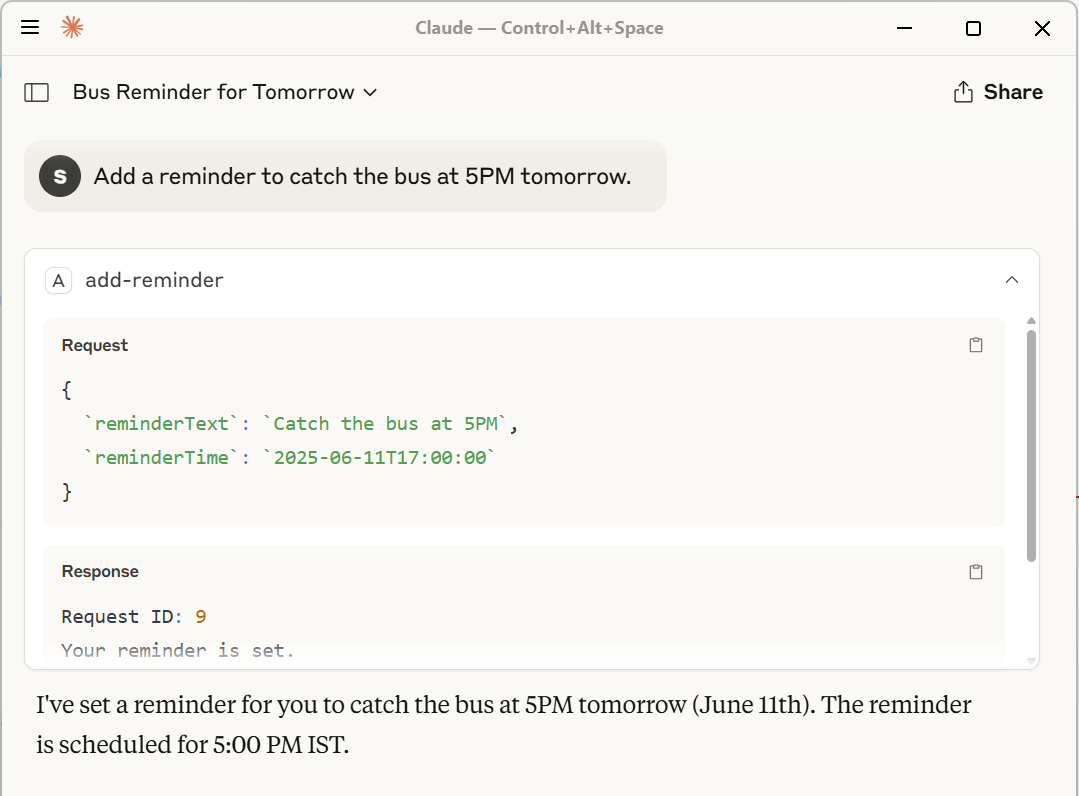
Sample prompt
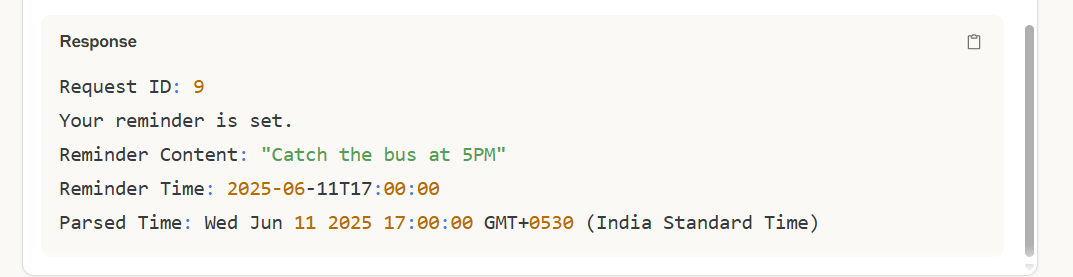
Add a reminder to catch the bus at 5PM tomorrow.
As seen above, the client automagically changes 5PM tomorrow to the correct ISO formatted string. The server, however, should definitely validate the parsed value.
Add a reminder to capture recurrence intent
Many reminders are not one-time events. They repeat on a schedule (e.g., “every Monday at 9am” or “on the 1st of every month”).
If you prompt the server with the current code with something like Add a reminder to catch the bus at 5PM everyday you will typically only capture the first instance because ISO date strings do not capture recurrence.
To support this, let’s add a recurranceTime parameter to our add-reminder tool. We’ll use the iCalendar (RFC 5545) recurrence rule format, commonly known as “RRULE”, to describe recurrence patterns.
Update your tool registration as follows:
import { z } from "zod";

server.tool(
  "add-reminder",
  "Add a reminder for the user",
  {
    reminderText: z
      .string()
      .describe("Free form text containing the content of the reminder"),
    reminderTime: z
      .string()
      .optional()
      .describe(
        "Contains the date time of the reminder in ISO format if it is specified by the user. Use this field only if a single specific point in time is mentioned in the reminder. For recurring reminders, use recurranceTime."
      ),
    recurranceTime: z
      .string()
      .optional()
      .describe(
        "Contains the date time of the recurring reminder in iCalendar RRULE format if it is specified by the user. Use this field only for recurring reminders or for reminders with more than one point in time. If a single specific point in time is mentioned in the reminder, use reminderTime field."
      ),
  },
  async ({ reminderText, reminderTime, recurranceTime }, ctx) => {
    // Validate reminderTime as before
    let parsedTime: Date | null = null;
    if (reminderTime) {
      try {
        parsedTime = new Date(reminderTime ?? "");
        if (isNaN(parsedTime.getTime())) {
          throw new Error("Invalid date");
        }
      } catch (e) {}
    }

    // Optionally validate RRULE format (basic check)
    let rruleValid = true;
    if (recurranceTime) {
      rruleValid = recurranceTime.startsWith("FREQ="); // TODO Use a library to validate
    }

    let response = [
      `Request ID: ${ctx.requestId}`,
      `Your reminder is set.`,
      `Reminder Content: "${reminderText}"`,
      `Reminder Time: ${reminderTime}`,
      `Parsed Time: ${parsedTime}`,
      `Recurrence Rule: ${recurranceTime || "None"}`,
      `Recurrence Rule Valid: ${rruleValid}`,
    ];
    return {
      content: [{ type: "text", text: response.join("\n") }],
    };
  }
);
recurranceTimeis alsooptional().rruleValid = recurranceTime.startsWith("FREQ=")is just a placeholder. Use a library to validate RRULE.- Description of
reminderTimeandrecurranceTimehave been updated to let the client know when to use what.
Sample prompt
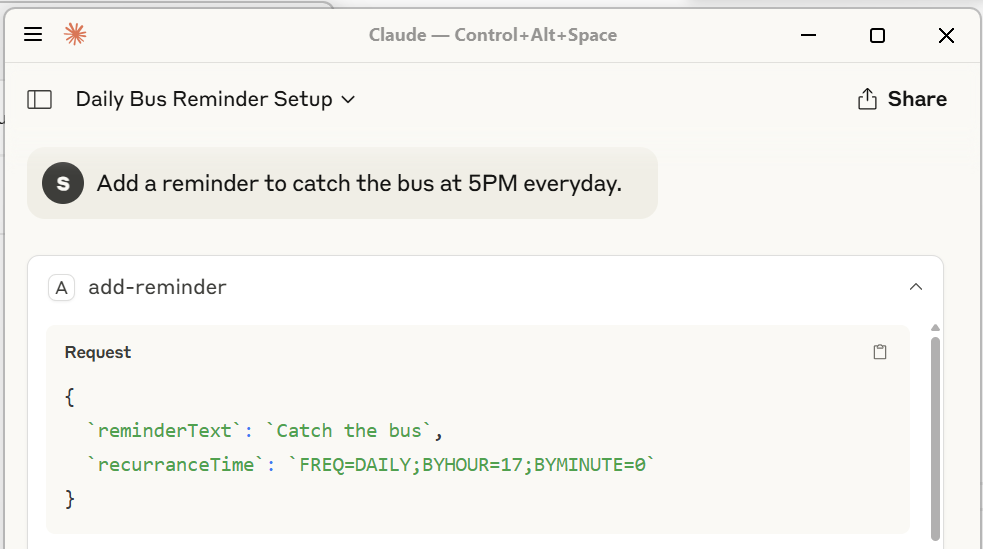
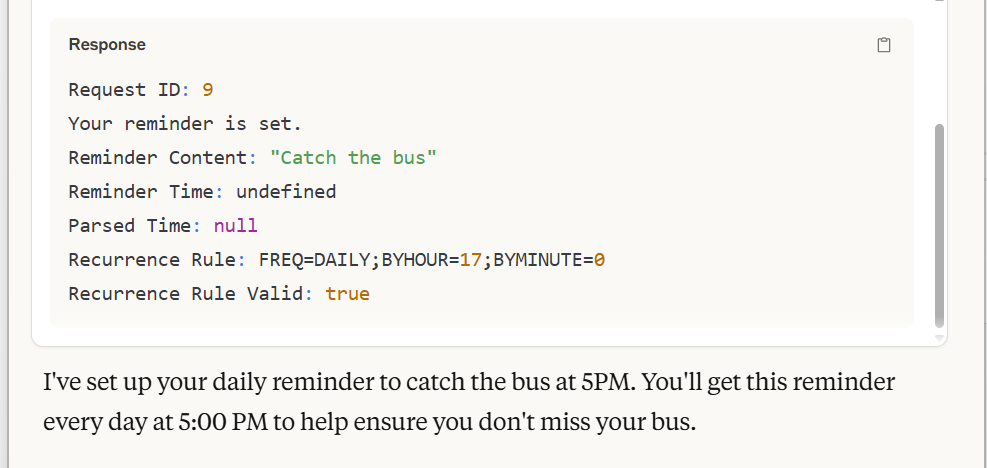
Add a reminder to catch the bus at 5PM everyday.
Now instead of passing the date in reminderTime, you should get a value like FREQ=DAILY;BYHOUR=17;BYMINUTE=0 (every day at 5PM) in recurranceTime.
Congratulations, you have a functional MCP server.
Learnings
- Use Structured Inputs. Define clear, typed input schemas for each tool. Avoid free-form text when possible.
- Validate and Normalize Inputs. Ensure your server validates and normalizes inputs. For example, parse and check date/time formats.
- Expect mistakes from the client. Add proper defenses for incorrect inputs and workflows.
- Use optional fields to eliminate the client force fitting values.
- Document your tool descriptions and argument schemas well for best client compatibility.
- Use MCP Inspector and other tools to debug and iterate quickly.